How to Onboard a New Client Onto Your Meta Ads Reporting Dashboard
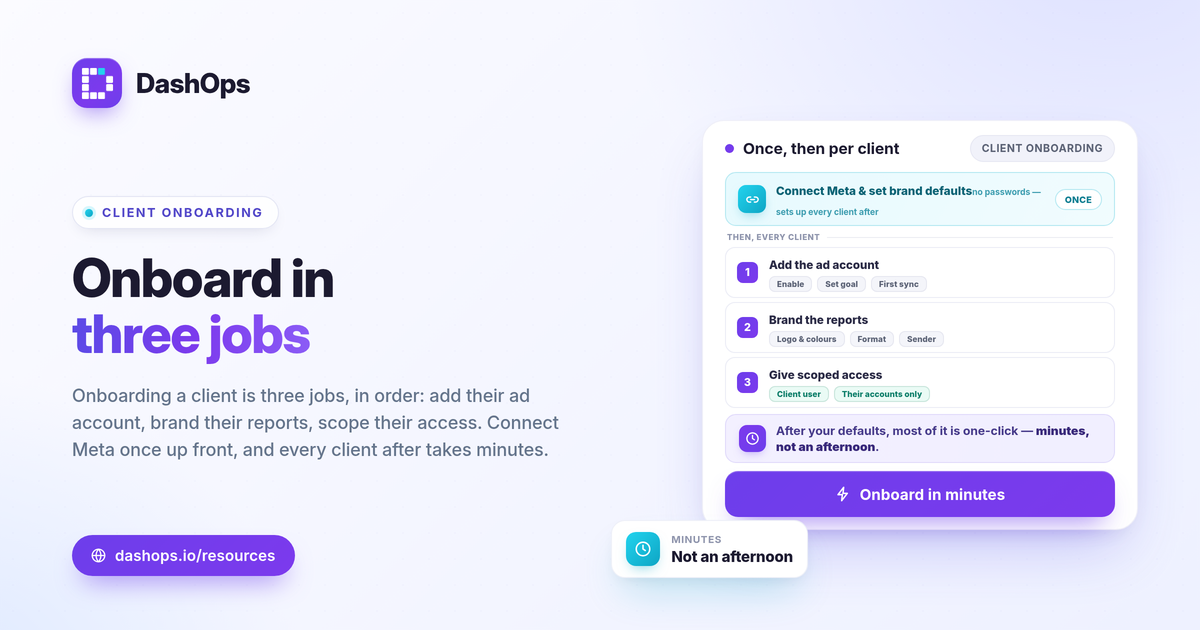
Onboarding a new client onto your Meta Ads reporting dashboard should take minutes, not an afternoon of clicking around. The work breaks into three jobs: add the client’s ad account, brand their reports so they look like your work, and give the right people scoped access. Do them in that order, with a checklist you reuse every time, and onboarding stops being a chore. This guide lays out that checklist for the whole flow of onboard client Meta Ads reporting, whether you are a freelancer taking on your fifth account or an agency standardising how every new client gets set up.
Before you start: connect Meta once
The single biggest time saver is doing the connection step once, not per client. You connect your Meta Business account to the dashboard through Meta’s official secure sign-in, and from then on every ad account you have access to is available to enable. You are not pasting tokens or sharing passwords. The dashboard reads the same Meta data underneath that you already see in Ads Manager.
A few things to confirm up front so the rest of the onboarding is smooth:
- You have the right Meta access. You need a role on the client’s ad account in Meta Business Manager (or the client needs to grant your agency access). The dashboard can only enable accounts you are already permitted to manage.
- You know the client’s goal. Lead generation and e-commerce lead with different numbers. Knowing this now means the dashboard surfaces the right KPIs from day one.
- You have your own branding ready. Logo, brand colours, and the email address you want reports to come from. Set these once and they carry across every client.
If you want a refresher on the metrics each client type cares about, the 17 Meta Ads KPIs to track is a good primer to skim before the first call.
Step 1: Add the client’s ad account
This is the core of “add client ad account dashboard” and it is the fastest step once Meta is connected.
- Enable the account. From your connected Meta accounts, switch on the specific ad account this client runs. You only enable what you manage, so there is no risk of pulling in the wrong account.
- Confirm the goal type. Mark the account as lead-gen or e-commerce so the dashboard leads with leads and cost per lead, or with purchases and ROAS. This is what makes the client’s first view read clearly instead of burying the number they care about.
- Run the first sync. Pull historical data so the dashboard has a baseline. A first sync on a large account can take a few minutes because it reads everything from Meta, so kick it off and move on to branding while it runs.
That is the whole of connecting a client Facebook ad account: enable, set the goal, sync. There is no manual data entry, and nothing to maintain by hand.
Step 2: Brand the client’s reports
Branding is where a generic tool starts to look like your work. For client onboarding reporting, this step is what turns a raw export into something you are happy to put your name on.
- Set your logo and colours. These flow to the dashboard, the client portal, and the PDF and Excel reports. Set them once at the account level and they apply everywhere.
- Choose the report format. Decide whether this client gets a PDF, an Excel file, a CSV, or a live share link. Different clients want different things; pick a default per client so you are not deciding it every month.
- Set the report sender. On the Enterprise plan you can send report emails and digests from your own domain, so even the inbox looks like you rather than the tool underneath.
How far branding goes depends on your plan. Growth includes white-label Lite (your logo, colours, and hiding the footer mark). Enterprise adds white-label Full, including a custom domain and custom email sender. If you report to clients regularly, the depth is worth understanding, and white-label client reporting walks through each layer.
Step 3: Give scoped access
The third job is deciding who logs in and what they can see. This is “agency client setup” done right: the client sees their account and nothing else.
- Invite the client as a read-only user. A Client user role gets a simplified portal showing only the ad accounts assigned to them. They cannot edit campaigns or see other clients.
- Assign only their ad accounts. Scope each client invite to the specific accounts they own. One client never sees another client’s data.
- Keep the portal read-only. The Client role is read-only by design, so the client can view their reporting but cannot edit campaigns or change settings. That keeps the relationship clean: they get visibility, you keep control.
- Add your own team if needed. A Team member can manage the accounts assigned to them, while the Admin (owner) keeps full control. Match the role to the job.
Scoped access protects both sides. The client gets a clean, jargon-light view of their own results. You keep a clear boundary between accounts, which matters the moment you have more than one client in the same dashboard.
Make it repeatable: a reusable checklist
The reason onboarding takes hours for some people is that they reinvent it each time. Write it down once and it takes minutes. A working version:
- Confirm Meta access to the client’s ad account.
- Enable the ad account and set its goal type.
- Run the first sync.
- Apply your branding and pick the report format.
- Invite the client as a read-only user, scoped to their accounts.
- Confirm they have the read-only Client role, not a wider one.
- Schedule their recurring report or digest.
- Send the client their login link.
Steps four and below are mostly one-click once your defaults are set. The only per-client thinking is the goal type, who gets access, and the report cadence. Everything else is mechanical, which is exactly what you want from an onboarding flow you run dozens of times. Managing several accounts this way is far calmer than juggling logins, and managing multiple Meta ad accounts covers the wider workflow.
Where DashOps fits
DashOps is built for this exact flow: connect your Meta accounts once, enable a client’s ad account in a click, brand the reports and client portal, and invite the client as a read-only user scoped to only their accounts. White-label Lite comes with Growth and white-label Full with Enterprise, so you can match the depth to your plan. See what each plan includes on the pricing page, and the help center covers the setup steps end to end.
Standardise the three jobs once, add account, brand, scope, and every new client after the first one is a few minutes of work instead of an afternoon.
Frequently asked questions
How long should it take to onboard a new client onto a reporting dashboard?
Do I need the client's Facebook password to connect their ad account?
What can a client see when I give them access, and what stays private?
See it in your own dashboard
DashOps brings Meta Ads reporting, campaign management, and white-label client portals into one place. Pick the plan that fits how you run ads.